How to Create Color Spots From Images in Illustrator and Photoshop

Hi, this is Gabby from Speedy Sep. Today, I will show you how to create Spot Colors from Images for screen printing purposes.
Feel free to follow along in Adobe Photoshop. To begin, let’s duplicate our image to preserve the original layer, then go to Select Color Range to begin our color separation process for Red. In our Color Range Settings, go ahead and bring your cursor to a section with Red and use the Eyedropper to select. From here, we will manipulate our selection.
Let’s bring the Fuzziness up to the max and click OK. Now you see that most of our Red are selected, go ahead and click Command J, or New Layer via Copy. Let’s throw that on a Solid White background to see our Red information more clearly. And that looks good.
So, let’s move on to the Navy. So, let’s go back to our American flag layer. Go to Select Color Range, and let’s click on a section of the Navy. Now, at the max Fuzziness, we are not seeing our selection just by the stars. Let’s bring our Fuzziness down to about 100, 120, 150. 135 looks good. It looks like we have selected most of the Navy information here.
At the bottom of this pop up, there is an option to change the Selection Preview. Let’s go ahead and change it to Grayscale scale so that we can see a blown-up version of our selection. Let’s go with 115. And now, let’s click Command J to bring our Navy onto a new layer, and put it on top of the Red and the White backing.
And now we’re going to do the Black, or as we can visually see, the shadows. Let’s go ahead and duplicate our American flag layer and go to Blending Options and change to Luminosity. Let’s put it over our White backing so that we see our image become a Black and White image. This will help us select our shadows better and more clearly.
We’ll bring our Fuzziness down, maybe about 30. And we’ll hit Command J. Put it above our Navy. And let’s go ahead and put a color overlay of Black. And it’s looking a little too drastic. So, let’s go ahead and delete that layer. I’m going to start again.
Go to Select Color Range. Go to the darkest sections. Click OK. Make sure we’re on that layer. Click Command J. Bring it above our Navy. And let’s not I forgot to put our color overlay of Black. That’s looking better.
But maybe let’s try one more thing. Let’s go manipulate the levels on our Black and White images. Our arrow on the left adjusts the shadows. The one in the center will adjust our mid-tones. And the one furthest to the right will adjust our highlights. Let’s go ahead and drag our leftmost arrow closer to the right. As for the mid-tones in the center, bring it over to the right. And for highlights on the far right, I think we’re good somewhat in the area maybe move a little to the left.
And now, we’re going to focus where the shadows create creases in the flag. Let’s try to click on one of the darkest areas of this particular element of our design. And we’ll play around with the Fuzziness, bringing it both up and down to get a better understanding of how our image is being manipulated. And this is definitely not an easy task to accomplish. So, this will require us to go through a process of trial and error to see what best results we can come up with.
And now, let’s save each color as its own TIFF, deselecting layers and making sure that we have saved the transparency. After repeating this for the Red, Navy, and Black layers, we’ll bring them over into Illustrator and apply Spot Color after converting it to Grayscale.
I’ll conclude by adding a few more elements to our design, including spot color.
And there we go. Thank you so much for watching this tutorial.
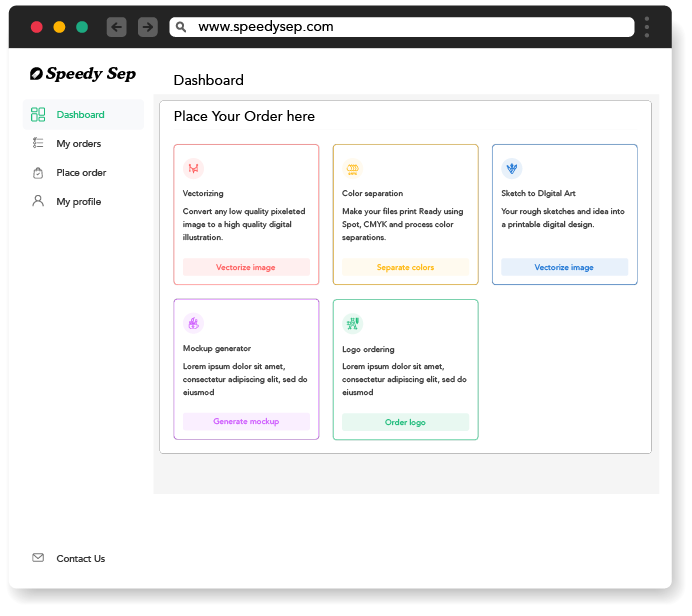
Hey, have you tried Speedy Sep ?
Try if free for 7 days and automate your print shop.
deadline

No credit card required.
